Harry Pellegrin's creation
of the
 Rory Gallagher Signature Model Story

                              (Or how I couldn’t find or afford the Fender offering, so I made my own.)

Two years ago, Fender didn’t announce the release of the Rory Gallagher Custom Shop Stratocaster.  In Fender’s defense, the forty replicas were commissioned by an independent Fender dealership in England, Arbiter of London, so this wasn’t a catalog item.  Of course, both the limited supply as well as the high demand for this item in Europe (plus Fender’s rather high retail price dictated by the obvious complexity of the replication process) placed this guitar well out of my hands.  But I still wanted one.
Gathering the pieces

When I saw a genuine Fender Stratocaster body up for auction on Ebay only fetching $50.00 in bids, I decided that I could create my own Rory Gallagher Signature Model, saving a huge fortune and having an interesting and good time in the process.

2                                           4

I placed my bid and waited.   To my surprise, I won at $55.00!  Seen here on day of delivery, the body was almost too nice to relic as drastically as Rory’s guitar


While no one will ever see this, the fact that the pickup routing is  mid-nineties in execution – note the humbucker mortise at the
bridge position – bummed me slightly.  This lacked authenticity.  I also was concerned that after stripping the paint, I’d findeither a lackluster grain figuring or a bunch of careless joinery.  Let’s face it, solid colors are not sprayed on AAA grade wood!
6

A Fender replacement neck of a 1960’s pattern would have had an incomplete headstock decal as well as cost $325.00.  Too expensive for something unauthentic.  Allparts supplied a ‘60’s style neck with a rosewood board for around 100 bucks.  This neck can be ordered with jumbo fret wire and a slightly flatter board – modifications that Rory had done to his neck.  Stewart MacDonald supplied all the small hardware including the pickguard, knobs and jack plate.  

                                                                                                                    8


I have a desk drawer full of Strat pickups and selected two ‘57/62
Custom Shop pickups  for the neck and mid position and a Texas Special pickup for the bridge position.  I understand that Rory used three ’61 pickups.  Rory I ain’t; I needed a pickup with more guts in the bridge position.  I had a small assortment of pickup covers in my drawer and matched the covers to a photo of Rory circa early ’73.  The bridge cover appears fairly white in the photo, the neck position appears cream colored, the middle is a light cream.  The knobs are cream as well.


The tuning machines are ‘60’s vintage reissue pieces, the bridge is the part number Fender uses on their American Series ’62 Reissue Stratocaster.  It is a beautiful piece -- $69.95.
14    10   12

Stripping the finish

Well, at this point it seemed as if I had all the parts and could begin the process.  I decided to start with the body, as this had the potential to take the most time and most planning.  I studied photos of Rory’s guitar from different stages in his career and the guitar’s decomposition.  I love the look of his guitar in the Irish Tour ’74 video, so decided to go for that replication.  I was surprised to discover that there was quite a bit of the original color – and by that, I mean the red/brown and yellow of the burst.  I wasn’t going to get away with just stripping off paint, I was going to have to burst areas after I’d stripped them.  Using Zip Strip, I began my attempt to remove the amazingly heavy and durable epoxy(?) finish from the body.  It soaked for two days before the paint would even do anything more than slightly etch.  This Fender finish is good stuff!  Pity.  

18   16
                                   The photo at right was taken about a week into the stripping process.

26
I was hoping to save what I have begun to call the Eagle’s Head Profile on the upper bout of Rory’s guitar.  Here is a photo taken right after most of this figure chipped off.  A minor setback.  Imagine my delight when the paint came off and I saw that the body was joined in exactly the same places as the replica’s!  The grain is light, but tight and attractive.  I seemed to have really scored.  The rear of the instrument may prove hard to duplicate. 


Most photos of Rory do not allow one to see the back of the guitar.   I have seen the rear of the Fender replica courtesy of a German Fender dealer who was offering one of the forty for sale on the Internet.  The back is fairly stripped – it represents Rory’s guitar as it is today, not as it was in late ’73 – my target date.
 
22


I can only surmise how belt buckles and  Levi’s rivets had distressed the wood.   As I have no other complete photo of the back of Rory’s guitar at my target date, I decided to fake it following the incomplete photos I found. 

24


Here is a photo of a portion
of the back after stripping.


20


It was just about at this point that I developed a
serious need for a glimpse of the progress being made towards the guitar of the Master.  Even with the neck raw – and there’s a story here too, just wait a paragraph or two – and the hardware still out rusting in the back yard, for a giggle, I wanted to see what the instrument would look like ‘together.’  You’d be amazed (or maybe not) at the charge I got out of this peek.  This photo has been my compute desktop background for a few weeks now!

 
The Decal Saga

28

Now for the Decal Saga.  For a time now, folks have been auctioning Fender decals on Ebay.  Fender Musical Instrument Corporation routinely shuts down these auctions and their perpetrators, so you have to just catch things at the right time.  These decals are almost always home-brewed, and as I have purchased a number of them from various sources over the past few years, I can tell you that quality varies greatly, in both clarity and color of artwork as well as the workability of the decal – especially when applied under lacquer.  

These decals usually will set you back about twenty bucks – when you can find them.  In the past, I had refinished the neck of my 1995 Strat Standard that had seen better days.  I had played 150 shows a year on that guitar for four years straight.  The maple neck’s finish was worn through all over the place.  I purchased one decal from a source that promised that the merchandise would be good – and it was a very clear and well-colored decal.  It just wouldn’t stand up to even the lightest fog coat of lacquer.  I had to purchase a second one from him and try to figure why I was having difficulty.  I finally got an acceptable result by applying the decal over a light base coat, then using a pin and alcohol, pricking the decal all over and slightly melting the plastic carrier with the alcohol – a delicate and time-consuming task.  

This time around, I found a decal on Ebay with a BUY IT NOW option, so that was what I did.  Not the greatest clarity, so I tried another vendor – one who was just in the throes of being shut down by Fender.  I purchased one decal, she sent her entire remaining stock!  Score one for our team, her decals are awesome both in clarity and color as well as ease of application and coating.

Applying the finishes

But now you will note from the pictures above that the neck was quite light in color and I am going for the aged and sweated-on look of a vintage piece.  Enter Guitar Re-Ranch from Texas.  They offer vintage refinishing supplies and are a great website for information as well as product.  Their instructions for a vintage amber Fender neck refinish seemed well thought out and logical, so I took a gamble and ordered what I needed.

30 30

 They suggest a two step application.  Step one is an aniline dye in amber.  This colors the maple.  A nitrocellulose lacquer top-coat glosses it and keeps the aniline dye from coming off on your fingers.  Note pale headstock on left.  Note rich amber color on the after shot to the right.   See how great – and authentic the decal looks.   Here’s a gesture to the Custom Shop Replica: 34 
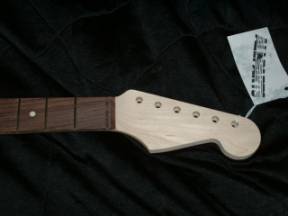
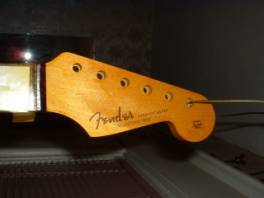
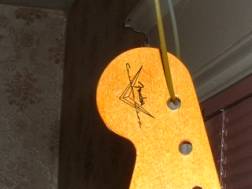
In the supply of decals my merchant sent, there were two Fender Custom Shop headstock reverse decals.  I figured why not mimic the replica a bit here?  The following shot shows my Custom Shop logo on rear. Notice in the small photo from the German dealer’s website a few pages ago that the neck is discolored where the left hand has rubbed the lacquer from the wood and finger oil and dirt has been absorbed.  At first, I thought to myself that I’d leave the neck raw in that area and let my hand do the dirty work, but then I realized I could apply a way heavier coating of the aniline dye there and rather than lacquer over it, apply tung oil.  This will retain the feel as well as the look of the raw wood plus give me that lived in vibe that I’m looking for.
36


At this point, it’s back to the body.  I’ve sanded it lightly though I’ve left the original black paint (busted up, of course) along the edges and n a few key spots on the front and the back.  I feel that leaving some of the guitar body’s original finish lends it a bit of mojo that would otherwise be lost.


38
I traced the patterns of paint from a photo of Rory circa 1974.  To the right, you’ll see the photo that for me is the benchmark.  I know that this is because I saw Rory in late ’73 – November 1973 to be more precise at New York’s Felt Forum and this is how I remember him and his guitar.  I don’t know who took this photo as someone sent it to me as a JPEG, but it is a great shot.

Here is a close-up of the upper bout and my tracing applied to it.  The entire guitar will be masked, except for the areas within these tracings.  Then I will apply a three-color sunburst and clear coats. 

Below is a detail of the area of finish remaining in ’74 in the area of the bridge and jack plate mortise.  Masking tape was applied over the outlines of the paint chips.  42 
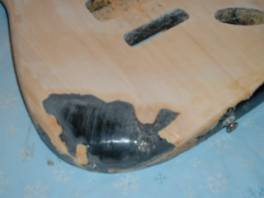
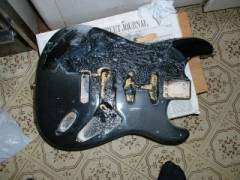
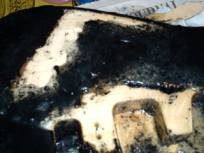
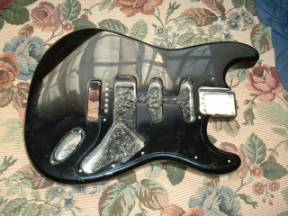
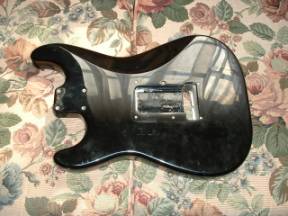
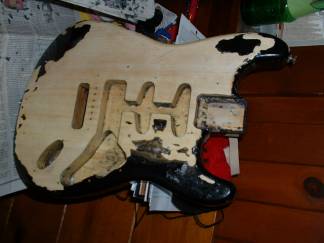
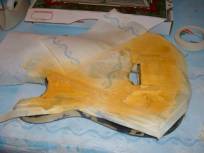
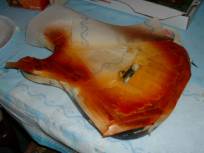
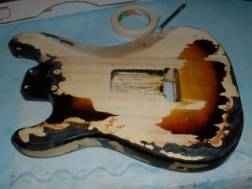
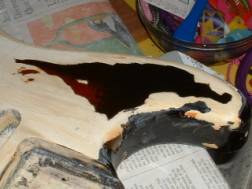
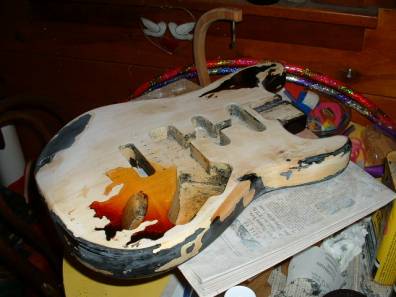
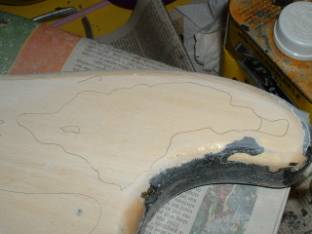
Then with an Exacto knife, I cut along the line and removed the masking tape from within the delineated area.  The rest of the body was 
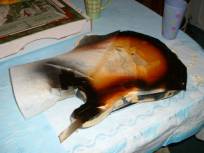
masked off with tape and shop toweling.  The burst is a three-part process, a yellow dye (I used the same aniline dye as on the neck) a reddish brown lacquer, the black edging lacquer and a clear coat over the top.
 I guess it’s really a four part process…


40

You can see the masking tape quite clearly in the following set of pictures.  The burst was quite easy to shoot and I would feel quite comfortable doing this type finish on an entire guitar.  It even looks quite good on the paper towel!

 Note that I changed the shape of the Eagle, which looked too ‘modern’ to me.


56 54 52
               First the yellow…                          Then a reddish-brown…         Finally, the black edging.

Here’s a close-up of the Eagle’s Profile.  There are two small chips below the Eagle, you can see them in the masking tape in the picture to the left.  The back was outlines from a few incomplete photos and a brief instant that I caught with the digital camera by snapping the TV screen during the Irish Tour ’74 video.  Are you beginning to see that this was a labor of love? Same sequence.  Here’s the final back, there was some bleed of the red/brown through the masking tape.  This easily sands out with 320 grit.
  58


Here is a photo of a portion of the back after stripping
.
Here is a photo of a portion of the back after stripping.
It clearly shows the Eagle’s Profile and to my infinite grief, it appears a different shape than my careful reproduction from the other photo of similar vintage.  I attribute this to the fact that the guitar is being viewed from different angles.  I hope.


60 62
                      Photo from the back of the Deuce album

64
At this point, I was more or less happy with the paint on the guitar, both for color as well as placement and ‘relic-ing’, but I was not so pleased with the pale, raw wood.  I tried a number of natural means to stain the wood and make it look like it was handled.  These included both tea as well as coffee applied to the wood.  You might be surprised how much coffee can be absorbed by raw wood while leaving hardly a trace!

 In this picture, one can clearly see the smooth contoured edge of the old black paint on the lower body by the jack socket mortise.  Very unauthentic.  A rasp took care of this.


But back to the light color of the raw wood.  After experimenting with various household concoctions (I figured Rory’s guitar was discolored by who-knows-what, but it certainly66 
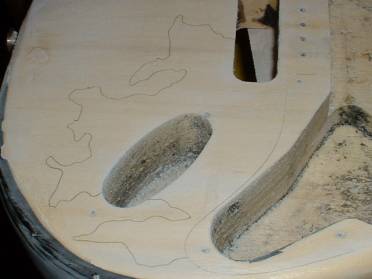
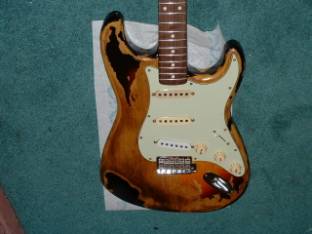
didn’t come out of a can),
 I had to resort to a store-bought preparation.

 I studied the MinWax color samples at the hardware store and settled on Early American #230.  It did a remarkable job in two passes (rub on with a cloth,
clean off the excess with a cloth) of darkening the
wood to match the early photos.  

This photo gave me pause to truly rejoice at the progress this project has seen.


Adding the Hardware
 &
the Completed Strat

68
I believe that Rory’s guitar was rewired so that one tone control rolled off the higher frequencies on all three pickups (unlike the stock set-up where neck and middle have an independent tone control each, the bridge pickup is only controlled by the volume control.)  I’ve been playing Strats for more years than I will admit to here and am used to the stock set-up, so that’s what I used on my Rory Strat.  

The rest of the hardware was installed with a minimum of fuss – the peg holes had to be reamed slightly to allow the grommets to press fit.  The body and neck didn’t go together quite as intended. The neck sat about an eighth of an inch too high, so I had to carefully drop the neck pocket in the body.  Assembly took six hours including a complete and thorough set-up.

Today I played the Strat for the first time in performance.  The neck and mid pickup provide that 70 
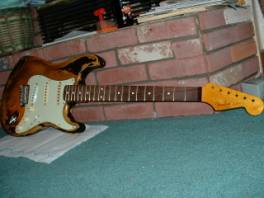
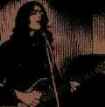
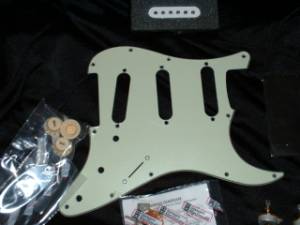
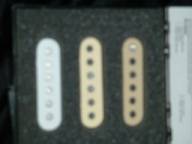
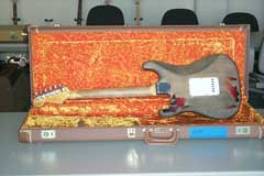
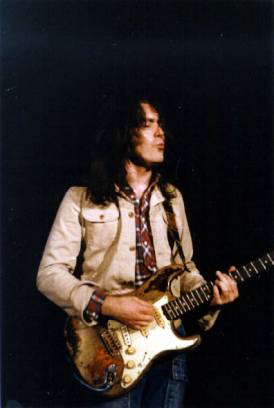
wonderful glassy, shimmery Fender tone when the volume knob is rolled back to the seven-eight position.  They fatten up and (with a Blues Driver pedal) distort in a very vintage way when full on.  The bridge pickup, my Texas Special, is a snotmeister and very much needed for my playing style.  The Allparts neck is terrific.  It feels just like my 1971 Telecaster (a good thing) and very close to my ’62 Strat reissue.
 I’m very happy with the outcome of this project. 

Total cost?  $107.00 for the neck, $55.00 for the body, $60.00 in stripper and paint, $110.00 in assorted hardware and three months of experimentation and futzing.  Much better than 6000 quid!  Plus, there’s the pride of accomplishment!  Strat seen here with my Elaine.


Harry G. Pellegrin

PLEASE NOTE!  This is Harry Pellegrin's story and his Strat. Sorry, I don't have any decals, nor does Harry!
Thanks
John Ganjamie ( aka roryfan)

To Join The Loop
Mailing & Discussion List

email roryfan at roryfan@comcast.net

  Back to main RoryON!! page

  Back to Articles page

Back to previous article


Forward to next article

208